Electron-vue
基于 vue (基本上是它听起来的样子) 来构造 electron 应用程序的样板代码。
什么是electron?
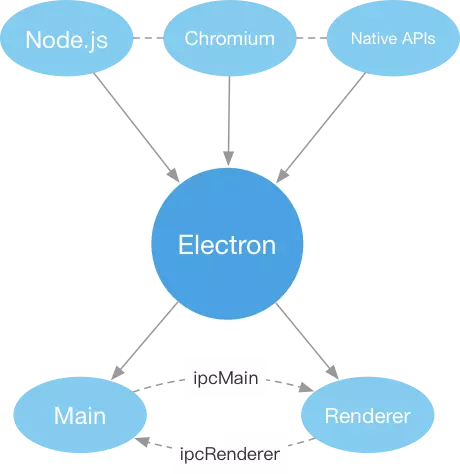
electron由Node.js+Chromium+Native APIs构成。你可以理解成,它是一个得到了Node.js和基于不同平台的Native APIs加强的Chromium浏览器,可以用来开发跨平台的桌面级应用。
它的开发主要涉及到两个进程的协作——Main(主)进程和Renderer(渲染)进程。简单的理解两个进程的作用:
- Main进程主要通过Node.js、Chromium和Native APIs来实现一些系统以及底层的操作,比如创建系统级别的菜单,操作剪贴板,创建APP的窗口等。
- Renderer进程主要通过Chromium来实现APP的图形界面——就是平时我们熟悉的前端开发的部分,不过得到了electron给予的加强,一些Node的模块(比如fs)和一些在3. Main进程里能用的东西(比如Clipboard)也能在Render进程里使用。
Main进程和Renderer进程通过ipcMain和ipcRenderer来进行通信。通过事件监听和事件派发来实现两个进程通信,从而实现Main或者Renderer进程里不能实现的某些功能。
起步
该样板代码被构建为 vue-cli 的一个模板,并且包含多个选项,可以自定义你最终的脚手架程序。本项目需要使用 node@^7 或更高版本。electron-vue 官方推荐 yarn 作为软件包管理器,因为它可以更好地处理依赖关系,并可以使用 yarn clean 帮助减少最后构建文件的大小。
1
2
3
4
5
6
7
8
| # 安装 vue-cli 和 脚手架样板代码
npm install -g vue-cli
vue init simulatedgreg/electron-vue my-project
# 安装依赖并运行你的程序
cd my-project
yarn # 或者 npm install
yarn run dev # 或者 npm run dev
|
项目结构
1
2
3
4
5
6
7
8
9
10
11
12
13
14
15
16
17
18
19
20
21
22
23
24
25
26
27
28
29
30
31
32
33
34
35
36
37
| my-project
├─ .electron-vue
│ └─ <build/development>.js files
├─ build
│ └─ icons/
├─ dist
│ ├─ electron/
│ └─ web/
├─ node_modules/
├─ src
│ ├─ main
│ │ ├─ index.dev.js
│ │ └─ index.js
│ ├─ renderer
│ │ ├─ components/
│ │ ├─ router/
│ │ ├─ store/
│ │ ├─ App.vue
│ │ └─ main.js
│ └─ index.ejs
├─ static/
├─ test
│ ├─ e2e
│ │ ├─ specs/
│ │ ├─ index.js
│ │ └─ utils.js
│ ├─ unit
│ │ ├─ specs/
│ │ ├─ index.js
│ │ └─ karma.config.js
│ └─ .eslintrc
├─ .babelrc
├─ .eslintignore
├─ .eslintrc.js
├─ .gitignore
├─ package.json
└─ README.md
|
产品构建
1
2
3
4
5
6
7
8
9
| app.asar
├─ dist
│ └─ electron
│ ├─ static/
│ ├─ index.html
│ ├─ main.js
│ └─ renderer.js
├─ node_modules/
└─ package.json
|
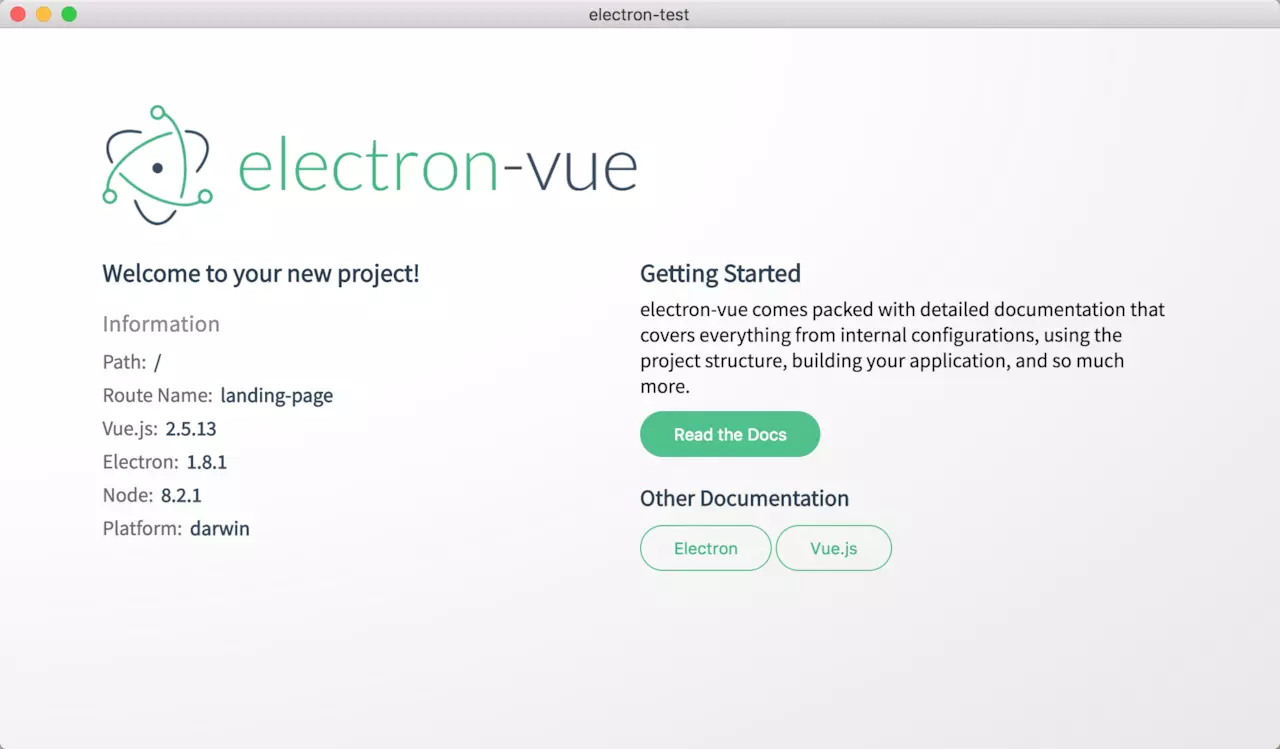
运行效果