Flutter Http请求开源库-dio

文档语言: English | 中文简体

dio

image.png

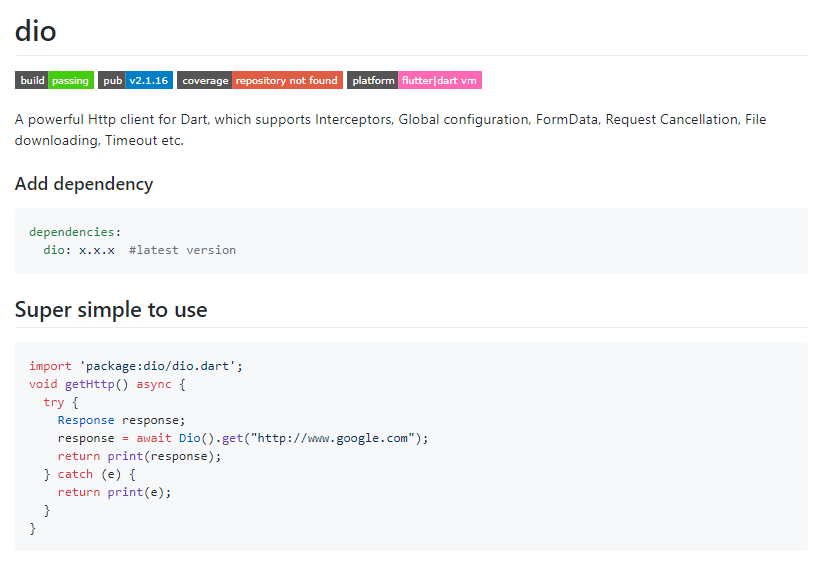
dio是一个强大的Dart Http请求库,支持Restful API、FormData、拦截器、请求取消、Cookie管理、文件上传/下载、超时等…

添加依赖

1
2
dependencies:
dio: ^x.x.x // 请使用pub上的最新版本

一个极简的示例

1
2
3
4
5
6
7
8
9
10
import 'package:dio/dio.dart';
void getHttp() async {
try {
Response response;
response = await Dio().get("http://www.baidu.com");
return print(response);
} catch (e) {
return print(e);
}
}

内容列表

示例

发起一个 GET 请求 :

1
2
3
4
5
6
7
  Response response;
Dio dio = new Dio();
response = await dio.get("/test?id=12&name=wendu")
print(response.data.toString());
// 请求参数也可以通过对象传递,上面的代码等同于:
response = await dio.get("/test", data: {"id": 12, "name": "wendu"});
print(response.data.toString());

发起一个 POST 请求:

1
response = await dio.post("/test", data: {"id": 12, "name": "wendu"});

发起多个并发请求:

1
response = await Future.wait([dio.post("/info"), dio.get("/token")]);

下载文件:

1
response = await dio.download("https://www.google.com/", "./xx.html");

发送 FormData:

1
2
3
4
5
FormData formData = new FormData.from({
"name": "wendux",
"age": 25,
});
response = await dio.post("/info", data: formData);

通过FormData上传多个文件:

1
2
3
4
5
6
7
8
9
10
11
12
13
14
FormData formData = new FormData.from({
"name": "wendux",
"age": 25,
"file1": new UploadFileInfo(new File("./upload.txt"), "upload1.txt"),
//支持直接上传字节数组 (List<int>) ,方便直接上传内存中的内容
"file2": new UploadFileInfo.fromBytes(
utf8.encode("hello world"), "word.txt"),
// 支持文件数组上传
"files": [
new UploadFileInfo(new File("./example/upload.txt"), "upload.txt"),
new UploadFileInfo(new File("./example/upload.txt"), "upload.txt")
]
});
response = await dio.post("/info", data: formData);

监听发送(上传)数据进度:

1
2
3
4
5
6
7
response = await dio.post(
"http://www.dtworkroom.com/doris/1/2.0.0/test",
data: {"aa": "bb" * 22},
onUploadProgress: (int sent, int total) {
print("$sent $total");
},
);

…你可以在这里获取所有示例代码.

Dio APIs

创建一个Dio实例,并配置它

你可以使用默认配置或传递一个可选 Options参数来创建一个Dio实例 :

1
2
3
4
5
6
7
8
9
10
11
12
13
Dio dio = new Dio; // 使用默认配置

// 配置dio实例
dio.options.baseUrl = "https://www.xx.com/api";
dio.options.connectTimeout = 5000; //5s
dio.options.receiveTimeout = 3000;

// 或者通过传递一个 `options`来创建dio实例
Options options = new Options(
baseUrl: "https://www.xx.com/api",
connectTimeout: 5000,
receiveTimeout: 3000);
Dio dio = new Dio(options);

Dio实例的核心API是 :

Future request(String path, {data, Options options,CancelToken cancelToken})

1
2
response = await request(
"/test", data: {"id": 12, "name": "xx"}, new Options(method: "GET"));

请求方法别名

为了方便使用,Dio提供了一些其它的Restful API, 这些API都是request的别名。

Future get(path, {data, Options options,CancelToken cancelToken})

Future post(path, {data, Options options,CancelToken cancelToken})

Future put(path, {data, Options options,CancelToken cancelToken})

Future delete(path, {data, Options options,CancelToken cancelToken})

Future head(path, {data, Options options,CancelToken cancelToken})

Future put(path, {data, Options options,CancelToken cancelToken})

Future path(path, {data, Options options,CancelToken cancelToken})

Future download(String urlPath, savePath,
{OnDownloadProgress onProgress, data, bool flush: false, Options options,CancelToken cancelToken})

请求配置

下面是所有的请求配置选项。 如果请求method没有指定,则默认为GET :

1
2
3
4
5
6
7
8
9
10
11
12
13
14
15
16
17
18
19
20
21
22
23
24
25
26
27
28
29
30
31
32
33
34
35
36
37
38
39
40
41
42
43
44
45
46
47
{
/// Http method.
String method;

/// 请求基地址,可以包含子路径,如: "https://www.google.com/api/".
String baseUrl;

/// Http请求头.
Map<String, dynamic> headers;

/// 连接服务器超时时间,单位是毫秒.
int connectTimeout;

/// 响应流上前后两次接受到数据的间隔,单位为毫秒。如果两次间隔超过[receiveTimeout],
/// [Dio] 将会抛出一个[DioErrorType.RECEIVE_TIMEOUT]的异常.
/// 注意: 这并不是接收数据的总时限.
int receiveTimeout;

/// 请求数据,可以是任意类型.
var data;

/// 请求路径,如果 `path` 以 "http(s)"开始, 则 `baseURL` 会被忽略; 否则,
/// 将会和baseUrl拼接出完整的的url.
String path = "";

/// 请求的Content-Type,默认值是[ContentType.JSON].
/// 如果您想以"application/x-www-form-urlencoded"格式编码请求数据,
/// 可以设置此选项为 `ContentType.parse("application/x-www-form-urlencoded")`, 这样[Dio]
/// 就会自动编码请求体.
ContentType contentType;

/// [responseType] 表示期望以那种格式(方式)接受响应数据。
/// 目前 [ResponseType] 接受三种类型 `JSON`, `STREAM`, `PLAIN`.
///
/// 默认值是 `JSON`, 当响应头中content-type为"application/json"时,dio 会自动将响应内容转化为json对象。
/// 如果想以二进制方式接受响应数据,如下载一个二进制文件,那么可以使用 `STREAM`.
///
/// 如果想以文本(字符串)格式接收响应数据,请使用 `PLAIN`.
ResponseType responseType;

/// `validateStatus` 决定http响应状态码是否被dio视为请求成功, 返回`validateStatus`
/// 返回`true` , 请求结果就会按成功处理,否则会按失败处理.
ValidateStatus validateStatus;

/// 用户自定义字段,可以在 [Interceptor]、[Transformer] 和 [Response] 中取到.
Map<String, dynamic> extra;
}

这里有一个完成的示例.

响应数据

当请求成功时会返回一个Response对象,它包含如下字段:

1
2
3
4
5
6
7
8
9
10
11
12
{
/// 响应数据,可能已经被转换了类型, 详情请参考Options中的[ResponseType].
var data;
/// 响应头
HttpHeaders headers;
/// 本次请求信息
Options request;
/// Http status code.
int statusCode;
/// 响应对象的自定义字段(可以在拦截器中设置它),调用方可以在`then`中获取.
Map<String, dynamic> extra;
}

示例如下:

1
2
3
4
5
Response response = await dio.get("https://www.google.com");
print(response.data);
print(response.headers);
print(response.request);
print(response.statusCode);

拦截器

每一个 Dio 实例都有一个请求拦截器 RequestInterceptor 和一个响应拦截器 ResponseInterceptor, 通过拦截器你可以在请求之前或响应之后(但还没有被 thencatchError处理)做一些统一的预处理操作。

1
2
3
4
5
6
7
8
9
10
11
12
13
14
15
16
17
dio.interceptor.request.onSend = (Options options){
// 在请求被发送之前做一些事情
return options; //continue
// 如果你想完成请求并返回一些自定义数据,可以返回一个`Response`对象或返回`dio.resolve(data)`。
// 这样请求将会被终止,上层then会被调用,then中返回的数据将是你的自定义数据data.
//
// 如果你想终止请求并触发一个错误,你可以返回一个`DioError`对象,或返回`dio.reject(errMsg)`,
// 这样请求将被中止并触发异常,上层catchError会被调用。
}
dio.interceptor.response.onSuccess = (Response response) {
// 在返回响应数据之前做一些预处理
return response; // continue
};
dio.interceptor.response.onError = (DioError e){
// 当请求失败时做一些预处理
return e;//continue
}

如果你想移除拦截器,你可以将它们置为null:

1
2
3
dio.interceptor.request.onSend = null;
dio.interceptor.response.onSuccess = null;
dio.interceptor.response.onError = null;

完成和终止请求/响应

在所有拦截器中,你都可以改变请求执行流, 如果你想完成请求/响应并返回自定义数据,你可以返回一个 Response 对象或返回 dio.resolve(data)的结果。 如果你想终止(触发一个错误,上层catchError会被调用)一个请求/响应,那么可以返回一个DioError 对象或返回 dio.reject(errMsg) 的结果.

1
2
3
4
5
dio.interceptor.request.onSend = (Options options) {
return dio.resolve("fake data")
}
Response response = await dio.get("/test");
print(response.data); //"fake data"

拦截器中支持异步任务

拦截器中不仅支持同步任务,而且也支持异步任务, 下面是在请求拦截器中发起异步任务的一个实例:

1
2
3
4
5
6
7
 dio.interceptor.request.onSend = (Options options) async {
//...If no token, request token firstly.
Response response = await dio.get("/token");
//Set the token to headers
options.headers["token"] = response.data["data"]["token"];
return options; //continue
}

Lock/unlock 拦截器

你可以通过调用拦截器的 lock()/unlock 方法来锁定/解锁拦截器。一旦请求/响应拦截器被锁定,接下来的请求/响应将会在进入请求/响应拦截器之前排队等待,直到解锁后,这些入队的请求才会继续执行(进入拦截器)。这在一些需要串行化请求/响应的场景中非常实用,后面我们将给出一个示例。

1
2
3
4
5
6
7
8
9
10
11
12
13
tokenDio = new Dio(); //Create a new instance to request the token.
tokenDio.options = dio;
dio.interceptor.request.onSend = (Options options) async {
// If no token, request token firstly and lock this interceptor
// to prevent other request enter this interceptor.
dio.interceptor.request.lock();
// We use a new Dio(to avoid dead lock) instance to request token.
Response response = await tokenDio.get("/token");
//Set the token to headers
options.headers["token"] = response.data["data"]["token"];
dio.interceptor.request.unlock();
return options; //continue
}

Clear()

你也可以调用拦截器的clear()方法来清空等待队列。

别名

请求拦截器被锁定时,接下来的请求将会暂停,这等价于锁住了dio实例,因此,Dio示例上提供了请求拦截器lock/unlock的别名方法:

dio.lock() == dio.interceptor.request.lock()

dio.unlock() == dio.interceptor.request.unlock()

dio.clear() == dio.interceptor.request.clear()

示例

假设这么一个场景:出于安全原因,我们需要给所有的请求头中添加一个csrfToken,如果csrfToken不存在,我们先去请求csrfToken,获取到csrfToken后,再发起后续请求。 由于请求csrfToken的过程是异步的,我们需要在请求过程中锁定后续请求(因为它们需要csrfToken), 直到csrfToken请求成功后,再解锁,代码如下:

1
2
3
4
5
6
7
8
9
10
11
12
13
14
15
16
17
dio.interceptor.request.onSend = (Options options) {
print('send request:path:${options.path},baseURL:${options.baseUrl}');
if (csrfToken == null) {
print("no token,request token firstly...");
//lock the dio.
dio.lock();
return tokenDio.get("/token").then((d) {
options.headers["csrfToken"] = csrfToken = d.data['data']['token'];
print("request token succeed, value: " + d.data['data']['token']);
print('continue to perform request:path:${options.path},baseURL:${options.path}');
return options;
}).whenComplete(() => dio.unlock()); // unlock the dio
} else {
options.headers["csrfToken"] = csrfToken;
return options;
}
};

完整的示例代码请点击 这里.

错误处理

当请求过程中发生错误时, Dio 会包装 Error/Exception 为一个 DioError:

1
2
3
4
5
6
7
8
9
10
11
12
13
14
15
16
try {
//404
await dio.get("https://wendux.github.io/xsddddd");
} on DioError catch (e) {
// The request was made and the server responded with a status code
// that falls out of the range of 2xx and is also not 304.
if (e.response) {
print(e.response.data);
print(e.response.headers);
print(e.response.request);
} else {
// Something happened in setting up or sending the request that triggered an Error
print(e.request);
print(e.message);
}
}

DioError 字段

1
2
3
4
5
6
7
8
9
10
11
12
13
 {
/// 响应信息, 如果错误发生在在服务器返回数据之前,它为 `null`
Response response;

/// 错误描述.
String message;

/// 错误类型,见下文
DioErrorType type;

/// 错误栈信息,可能为null
StackTrace stackTrace;
}

DioErrorType

1
2
3
4
5
6
7
8
9
10
11
12
13
14
15
16
17
18
19
enum DioErrorType {
/// Default error type, usually occurs before connecting the server.
DEFAULT,

/// When opening url timeout, it occurs.
CONNECT_TIMEOUT,

/// Whenever more than [receiveTimeout] (in milliseconds) passes between two events from response stream,
/// [Dio] will throw the [DioError] with [DioErrorType.RECEIVE_TIMEOUT].
///
/// Note: This is not the receiving time limitation.
RECEIVE_TIMEOUT,

/// When the server response, but with a incorrect status, such as 404, 503...
RESPONSE,

/// When the request is cancelled, dio will throw a error with this type.
CANCEL
}

使用application/x-www-form-urlencoded编码

默认情况下, Dio 会将请求数据(除过String类型)序列化为 JSON. 如果想要以 application/x-www-form-urlencoded格式编码, 你可以显式设置contentType :

1
2
3
4
//Instance level
dio.options.contentType=ContentType.parse("application/x-www-form-urlencoded");
//or works once
dio.post("/info",data:{"id":5}, options: new Options(contentType:ContentType.parse("application/x-www-form-urlencoded")));

这里有一个示例.

FormData

Dio支持发送 FormData, 请求数据将会以 multipart/form-data方式编码, FormData中可以一个或多个包含文件 .

1
2
3
4
5
6
FormData formData = new FormData.from({
"name": "wendux",
"age": 25,
"file": new UploadFileInfo(new File("./example/upload.txt"), "upload.txt")
});
response = await dio.post("/info", data: formData);

注意: 只有 post 方法支持发送 FormData.

这里有一个完整的示例.

转换器

转换器Transformer 用于对请求数据和响应数据进行编解码处理。Dio实现了一个默认转换器DefaultTransformer作为默认的 Transformer. 如果你想对请求/响应数据进行自定义编解码处理,可以提供自定义转换器,通过 dio.transformer设置。

请求转换器 Transformer.transformRequest(...) 只会被用于 ‘PUT’、 ‘POST’、 ‘PATCH’方法,因为只有这些方法才可以携带请求体(request body)。但是响应转换器 Transformer.transformResponse() 会被用于所有请求方法的返回数据。

执行流

虽然在拦截器中也可以对数据进行预处理,但是转换器主要职责是对请求/响应数据进行编解码,之所以将转化器单独分离,一是为了和拦截器解耦,二是为了不修改原始请求数据(如果你在拦截器中修改请求数据(options.data),会覆盖原始请求数据,而在某些时候您可能需要原始请求数据). Dio的请求流是:

请求拦截器 >> 请求转换器 >> 发起请求 >> 响应转换器 >> 响应拦截器 >> 最终结果

这是一个自定义转换器的示例.

设置Http代理

Dio 是使用 HttpClient发起的http请求,所以你可以通过配置 httpClient来支持代理,示例如下:

1
2
3
4
5
6
7
8
dio.onHttpClientCreate = (HttpClient client) {
client.findProxy = (uri) {
//proxy all request to localhost:8888
return "PROXY localhost:8888";
};
// 你也可以自己创建一个新的HttpClient实例返回。
// return new HttpClient(SecurityContext);
};

完整的示例请查看这里.

Https证书校验

有两种方法可以校验https证书,假设我们的后台服务使用的是自签名证书,证书格式是PEM格式,我们将证书的内容保存在本地字符串中,那么我们的校验逻辑如下:

1
2
3
4
5
6
7
8
9
String PEM="XXXXX"; //证书内容
dio.onHttpClientCreate = (HttpClient client) {
client.badCertificateCallback=(X509Certificate cert, String host, int port){
if(cert.pem==PEM){ // 证书一致,则放行
return true;
}
return false;
};
};

X509Certificate是证书的标准格式,包含了证书除私钥外所有信息,读者可以自行查阅文档。另外,上面的示例没有校验host,是因为只要服务器返回的证书内容和本地的保存一致就已经能证明是我们的服务器了(而不是中间人),host验证通常是为了防止证书和域名不匹配。

对于自签名的证书,我们也可以将其添加到本地证书信任链中,这样证书验证时就会自动通过,而不会再走到badCertificateCallback回调中:

1
2
3
4
5
6
7
dio.onHttpClientCreate = (HttpClient client) {
SecurityContext sc = new SecurityContext();
//file为证书路径
sc.setTrustedCertificates(file);
HttpClient httpClient = new HttpClient(context: sc);
return httpClient;
};

注意,通过setTrustedCertificates()设置的证书格式必须为PEM或PKCS12,如果证书格式为PKCS12,则需将证书密码传入,这样则会在代码中暴露证书密码,所以客户端证书校验不建议使用PKCS12格式的证书。

请求取消

你可以通过 cancel token 来取消发起的请求:

1
2
3
4
5
6
7
8
9
10
11
CancelToken token = new CancelToken();
dio.get(url, cancelToken: token)
.catchError((DioError err){
if (CancelToken.isCancel(err)) {
print('Request canceled! '+ err.message)
}else{
// handle error.
}
});
// cancel the requests with "cancelled" message.
token.cancel("cancelled");

注意: 同一个cancel token 可以用于多个请求,当一个cancel token取消时,所有使用该cancel token的请求都会被取消。

完整的示例请参考取消示例.

Cookie管理

你可以通过 cookieJar 来自动管理请求/响应cookie.

dio cookie 管理 API 是基于开源库 cookie_jar.

你可以创建一个CookieJarPersistCookieJar 来帮您自动管理cookie, dio 默认使用 CookieJar , 它会将cookie保存在内存中。 如果您想对cookie进行持久化, 请使用 PersistCookieJar , 示例代码如下:

1
2
var dio = new Dio();
dio.cookieJar = new PersistCookieJar("./cookies");

PersistCookieJar 实现了RFC中标准的cookie策略. PersistCookieJar 会将cookie保存在文件中,所以 cookies 会一直存在除非显式调用 delete 删除.

更多关于 cookie_jar 请参考 : https://github.com/flutterchina/cookie_jar .

此开源项目为Flutter中文网(https://flutterchina.club) 授权 ,license 是 MIT. 如果您喜欢,欢迎star.

Flutter中文网开源项目计划

开发一系列Flutter SDK之外常用(实用)的Package、插件,丰富Flutter第三方库,为Flutter生态贡献来自中国开发者的力量。所有项目将发布在 Github Flutter中文网 Organization ,所有源码贡献者将加入到我们的Organization,成为成员. 目前社区已有几个开源项目开始公测,欢迎您加入开发或测试,详情请查看: Flutter中文网开源项目。 如果您想加入到“开源项目计划”, 请发邮件到824783146@qq.com, 并附上自我介绍(个人基本信息+擅长/关注技术)。

Features and bugs

Please file feature requests and bugs at the issue tracker.

Your browser is out-of-date!

Update your browser to view this website correctly. Update my browser now

×